As Seen in part 1 and 2; I’ve been working on the cabinet for the Star Trek Mirror Universe.
This past weekend; I intended to wrap up the Impulse Engine modification to the Mirror Universe pinball head. Unfortunatly it spilled over to Monday; mainly because I couldn’t get my Laser cutter into a completely operational state. 🙁
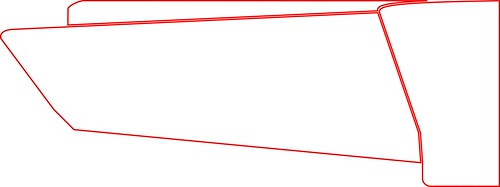
Anywho; The intent was to make the vent holes to look like the Enterprise’s Impulse Engine. To do this I created a stencil using the same scale and rendering as before. Since My laser cutter only has a 12×24 table; I had to only do 1/2 the stencil opting to flip it for the opposite side. Here’s the stencil I created:
I laser cut this out of dry erase poster board and sprayed it lightly with some stencil spray adhesive. Here it is positioned for the left Impulse Engine vent:
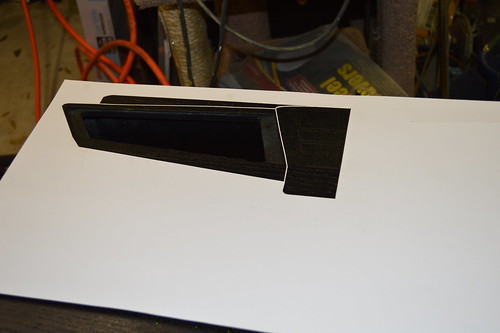
Since I didn’t have any grey spray paint on hand… and it was near or after midnight; I opted to spray with primer grey:
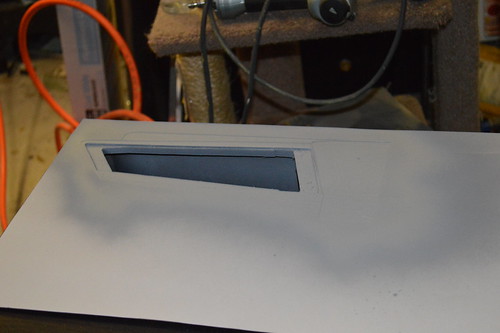
I then flipped the stencil (after the primer had dried for a couple of hours) and sprayed the other side with light stencil adhesive and then grey primer:
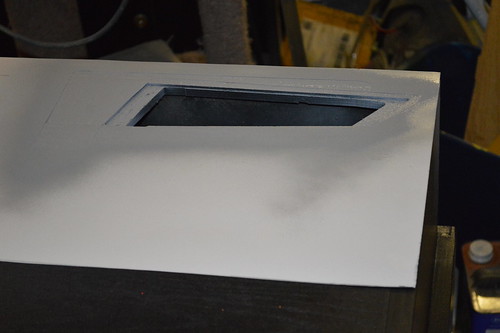
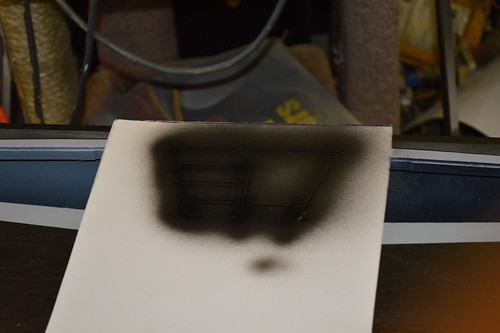
Now I needed to do some shading of the upper piece; So I used the drop pieces cut from the stencil as a stencil. Adhesive and some transparent black airbrush paint:
Next I needed to stencil the center panel lines. I had already laser etched the panel lines into the wood; but I decided attempting to hand paint the etch lines would be problematic. Cue Stencil number 2:

Adhesive, positioned:

Sprayed with Black Opaque Airbrush paint:
With the Stenciling complete; my attention returned to the Vents themselves. When I CNCed the wood; I also Laser cut a grill based upon the original render of the engines. The CorelDraw file looked like so:
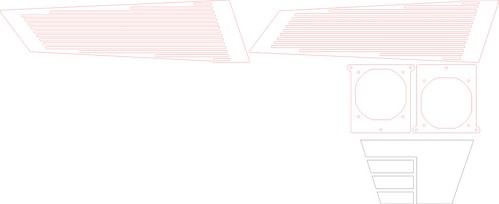
As you can see; there are two grills (finger guards if you like) and two 60mm Fan brackets. The grills were a particular bitch to cut… The heat would cause the grills to warp. I went ahead and cut them; only to find that one of the long lines broke on one of the grills. The result of these grills it pictured here:

Upon reflection; I determined that the cause of the warpage was proably the amount of heat “transferred” during the long cut lines. The “spaces” between the grill lines were about 0.1″… while the solid part of the grill was ~0.8″. This ratio was critical to the look I wanted (and to match reference photo). I also knew that the long runs were just too flimsy; so I had to modify the grill design to keep more “solid” acrylic in place. This would strengthen the grill and should help reduce the heat-induced warping. Design Rev#3:

I also changed the order of cut on the file. I opted to do the periphery outline AFTER the center grill portions were cut. Again in an effort to minimize heat transfer and aid in preventing cutting mishaps if I had to restart the cut.
Here’s the Laser At Techshop.ws cutting the Rev3 grills:

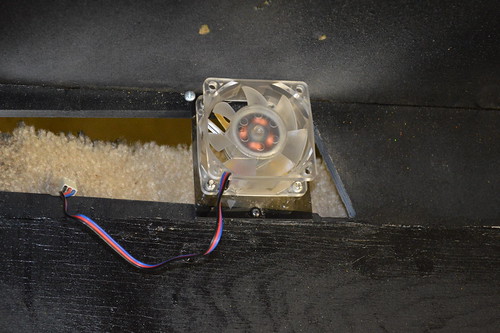
With the new grills complete; it’s time to begin the assembly of the fan brackets:

Installed:
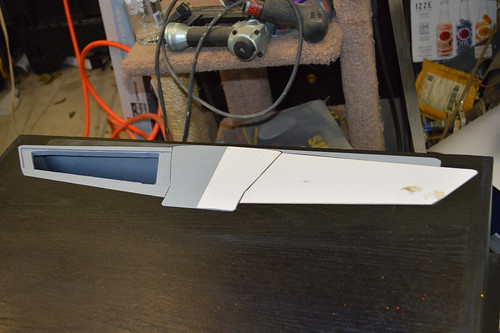
And the Test fit along with overall shot:
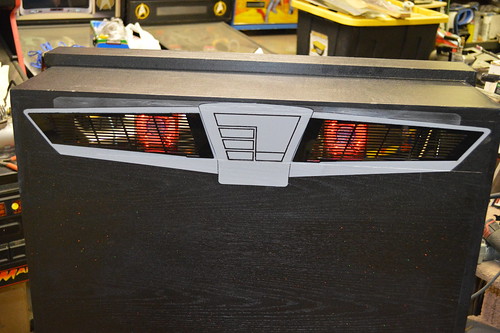
And a Closeup of the grills:
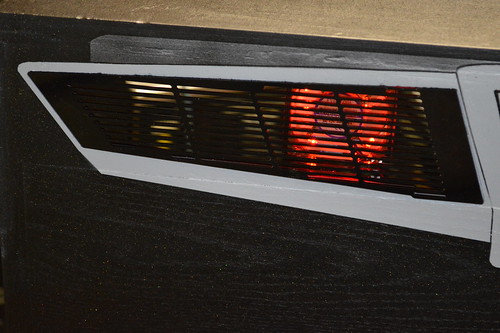
With that the back of the Star Trek: Mirror Universe head is complete. The grills were wrapped up and stored safely until the final stenciling is done on the sides and the whole piece is clear coated.